Campervan Solar Panels Overview
Going off‑grid is easier (and quieter) with a properly designed campervan solar system. This guide merges our video walkthrough with our written advice to give you a single, practical resource.
You’ll learn exactly how solar works in a van, how to size the system, which parts to choose (rigid vs flexible panels, MPPT controllers, lithium batteries), and how to install safely on fixed roofs and pop‑tops.

What we’ll cover
-
How campervan solar works (end‑to‑end flow)
-
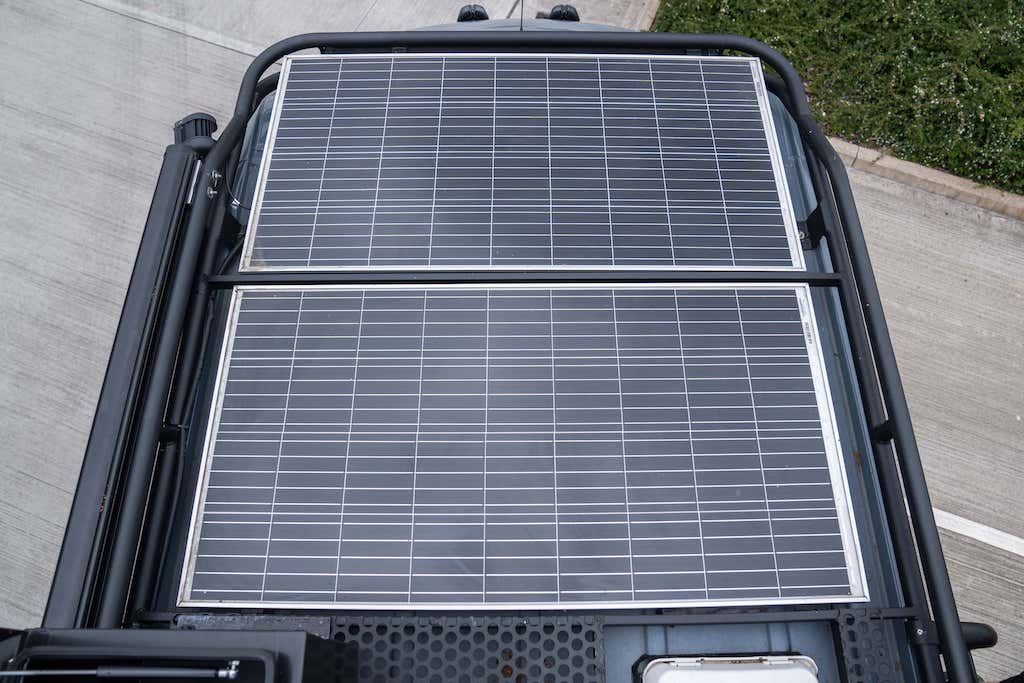
Choosing panels: rigid vs flexible + rear/top junction boxes
-
Sizing: daily energy needs, panel wattage, battery capacity, inverter size
-
MPPT vs PWM controllers & how to match ratings (e.g., 75/15)
-
Wiring: series vs parallel, fusing, cable gauge, isolators, RCD/earth
-
Pop‑top installs (bonding, cable routing that survives opening/closing)
-
Alternator & shore integration (DC‑DC + mains charger)
-
Monitoring, maintenance, common mistakes, troubleshooting
-
Real‑world example builds (Transporter, Crafter/MAN TGE gasless)
Don't feel like reading? Watch our YouTube Video below:
Why Campervan Solar is Essential
-
Off‑grid freedom: charge while parked—no hook‑ups or generators needed.
-
Quiet & clean: sustainable power straight into your leisure battery.
-
Always working: even in the UK, panels provide a useful trickle in low light.
-
Lower running costs: after install, sunlight is free.
If you’re aiming for a gasless setup (e.g., induction hob), solar capacity and lithium storage become must‑haves.
How a Campervan Solar System Works (Simple Flow)
-
Solar panels capture sunlight and output DC power.
-
Charge controller (MPPT/PWM) regulates panel voltage/current so batteries charge safely.
-
Leisure battery bank stores energy for use day/night.
-
12V DC loads run directly from the battery via fused circuits.
-
Inverter (optional) converts 12V DC → 230/240V AC for household sockets.
Choosing Solar Panels: Rigid vs Flexible
Rigid Panels
-
Aluminium frame + tempered glass; durable, efficient, long‑lasting.
-
Mounted on brackets/roof bars → slight aerodynamic drag.
-
Best on flat, fixed roofs (e.g., large vans).
Flexible (Semi‑flexible) Panels
-
Ultra‑thin/low‑profile; ideal for curved roofs and pop‑tops.
-
Minimal wind noise/drag when bonded correctly.
-
Often slightly less efficient and shorter lifespan than rigid.
Junction boxes: A rear junction box lets you hide cabling under the panel (cleaner, more waterproof). A top junction box leaves visible cables that must be routed through a cable gland.
Rule of thumb:
-
Pop‑top/curved roof: Flexible, rear‑junction, bonded.
-
Fixed, spacious roof: Rigid on brackets for maximum longevity/efficiency.
How Much Solar Wattage Do You Need?
Step 1 — Tally your daily energy use (Wh)
Create a quick table of your typical 24‑hour usage. Example:
| Device | Power (W) | Hrs/day | Daily Wh |
|---|---|---|---|
| 12V fridge | 45 | 12 (duty cycle) | 540 |
| LED lights | 15 | 4 | 60 |
| Phone/tablets | 20 | 2 | 40 |
| Laptop | 65 | 2 | 130 |
| Water pump | 60 | 0.2 | 12 |
| Total | 782 Wh |
Add ~15–25% headroom for inefficiencies → ~900–975 Wh/day.
Step 2 — Estimate panel energy harvest
A 200W panel can produce roughly:
-
UK summer: 3–5 peak‑sun‑hours → 600–1,000 Wh/day
-
UK shoulder seasons: 1.5–3 PSH → 300–600 Wh/day
-
UK winter: 0.5–1.5 PSH → 100–300 Wh/day
If your budget/roof allows, size for shoulder season so you’re not power‑starved 9 months of the year.
Quick sizing hints
-
Small setups (lights/USB, small fridge): 100–150W
-
Touring with laptop/camera: 200–300W
-
Gasless/induction or big vans: 300–600W+ (multiple panels)

Batteries: Lead‑Acid/AGM vs Lithium (LiFePO₄)
| Feature | Lead‑acid/AGM | Lithium (LiFePO₄) |
| Upfront cost | £ | ££–£££ |
| Weight/size | Heavy/Large | Light/Compact |
| Usable capacity | ~50% DoD | ~80–100% DoD |
| Charge rate | Slower | Faster |
| Lifespan (cycles) | Lower | Higher |
| Cold performance | Fair | Good (with BMS/heating options) |
For most modern builds—especially gasless—Lithium wins on weight, usable capacity, charge speed and lifespan (despite higher initial cost).
Capacity pointers:
-
Weekend trips/light use: 100–150Ah Lithium
-
Frequent off‑grid or induction cooking: 200–300Ah Lithium
-
Big rigs/work vans: 300–600Ah Lithium
Charge Controllers: MPPT vs PWM (and what 75/15 means)
-
PWM: cheaper, less efficient; OK in strong, stable sun.
-
MPPT: more efficient in variable UK conditions → recommended.
Decoding ratings (e.g., Victron 75/15):
-
75 = max PV voltage the controller can accept.
-
15 = max charge current (A) to the battery.
Match the controller to your panel/string open‑circuit voltage (Voc) and expected current. Leave margin for cold‑weather Voc increases.
Inverters: Picking the Right Size
-
300–1000W → laptops, chargers, TV.
-
2000–3000W → kettles, hairdryers, induction hobs.
Check each appliance label (or manual) for watts. Your inverter continuous rating must exceed the largest sustained load, and its surge rating should handle start‑up spikes.
Gasless builds with induction typically pair 3,000W pure‑sine inverters with robust cabling, fusing, and ventilation.

Wiring, Fusing & Protection (Safety First)
Golden rules
-
Fuse every positive leaving a battery or moving between major components (panel → controller, controller → battery, battery → inverter/DC loads).
-
Correct cable size to minimise voltage drop (<3% target on critical runs).
-
Short runs wherever possible.
Typical DC cable sizes (guidance, check your run length & current):
-
Panels → MPPT: 4–6 mm² (higher for long runs/parallel strings)
-
MPPT → Battery (up to 15–30A): 10–16 mm²
-
Battery → Inverter (2000–3000W at 12V = 167–250A): 50–70+ mm² with class‑T/MEGA fuse sized to inverter cable and spec.
Isolation & protection
-
PV isolator between panels and controller for maintenance.
-
Battery isolator on the main positive feed.
-
RCD on the 230/240V AC output and correct earthing/bonding.
-
Use glands/grommets, abrasion protection, and tidy loom routing.
Never substitute panel bonding with bathroom silicone. Use manufacturer‑approved structural adhesive/tape on clean, keyed surfaces.

Series vs Parallel (Panel Wiring)
-
Series: Voltages add, current stays similar → good for MPPT efficiency and long cable runs; beware controller voltage limits (cold Voc).
-
Parallel: Voltages stay same, current adds → shading on one panel impacts less; requires thicker cables & combiner/fusing.
Many small vans run single large panels to avoid mismatch/shading issues altogether.
Pop‑Top Installations (What Actually Works)
-
Choose flexible panels with rear junction boxes.
-
Bond to pop‑top skin with approved adhesive/tape (per panel OEM).
-
Route cables through a low‑profile gland near hinge line; add strain relief and slack for opening/closing cycles.
-
Protect moving sections with loom sleeve and soft bends; avoid sharp radii.
Optional: keep a portable folding panel in the garage to deploy at camp in winter or shade.

Alternator & Shore Power Integration
-
DC‑DC charger (e.g., 30–60A) from alternator to leisure battery is essential for modern smart alternators (Euro 6+).
-
Mains charger (e.g., 30–50A) for when you do have hook‑up; keeps lithium happy during storage and top‑ups.
-
MPPT + DC‑DC + mains charger can coexist—each with proper fusing and cabling to the battery bus.
Monitoring & Smart Control
-
Battery monitor (e.g., shunt‑based) shows State of Charge (SoC), amps in/out, time‑to‑empty.
-
Many modern MPPTs/DC‑DCs offer Bluetooth apps for live data and history.
-
For long trips, set low‑voltage cut‑offs and configure lithium BMS parameters correctly.
Common DIY Mistakes (and How to Avoid Them)
-
Skipping fuses → risk of fire and component damage.
-
Undersized cables/long runs → voltage drop, poor performance.
-
Wrong adhesives on flexible panels → panels peel off over time.
-
No battery monitor → flying blind; catch failing batteries before big trips.
-
Controller mismatch → MPPT voltage limit exceeded in cold weather.
Maintenance Checklist
-
Quarterly: check bonded panels and edge lift; inspect glands.
-
Clean glass/flexible surfaces with mild soap + soft cloth.
-
Verify app readings: daytime PV voltage/current, SoC trends.
-
Annually: torque‑check main lugs, inspect for heat discolouration.
Troubleshooting Quick Wins
-
Low output? Clean panels; check shading; confirm MPPT status lights.
-
Battery not charging? Check fuses/isolators, PV voltage at controller, controller → battery connection.
-
Inverter trips? Load exceeds rating, or cable/voltage drop starving inverter—upgrade cable, shorten run, or raise battery voltage (e.g., 24V architecture in big builds).
Real‑World Setups (Examples)
Mid‑Size Van (VW Transporter)
-
Panel: 200–300W flexible, rear junction, bonded.
-
Controller: MPPT 75/15 or 100/20 (depending on panel Voc/current).
-
Battery: 150–200Ah LiFePO₄.
-
Inverter: 1000–2000W (if needed).
-
DC‑DC: 30–40A smart‑alternator compatible.
-
Notes: Keep runs short; add battery monitor; ideal for long weekends + remote working.
Large Van / Gasless (Crafter or MAN TGE)
-
Panels: 400–600W (rigid or multiple flex), consider roof rack integration.
-
Controller: MPPT 100/30–100/50 (as per array Voc/current).
-
Battery: 300–400Ah LiFePO₄ (induction cooking, big inverter).
-
Inverter: 3000W pure sine.
-
DC‑DC: 50–60A; Mains charger 30–50A.
-
Notes: Ventilate inverter bay; Class‑T main fuse; RCD on AC circuits; clear cable management in serviceable trunking.
FAQ
How much solar do I need for a campervan in the UK?
200–300W suits many touring vans. If you’re gasless or wintering, aim for 400–600W+.
Is MPPT worth it over PWM?
Yes - especially in variable UK weather and with roof space limitations.
Do I need lithium?
Not strictly, but lithium’s higher usable capacity, fast charging and low weight make it the best choice for frequent off‑grid use.
Will flexible panels fly off?
Not if bonded correctly with the right adhesive and prepared surfaces; avoid silicone sealants.
Can I mix panels?
Avoid mixing different voltages/ages in the same string. If mixing, wire in parallel with separate fusing and consider multiple MPPT inputs.

Campervan Solar Final Thoughts
A well‑designed solar system turns your van into a quiet, capable off‑grid home. Size the array to your daily Wh needs, pick an MPPT, choose lithium if budget allows, wire safely with the right fusing and cable sizes, and keep an eye on performance with a good battery monitor. Do that—and you’ll travel with confidence, year‑round.


