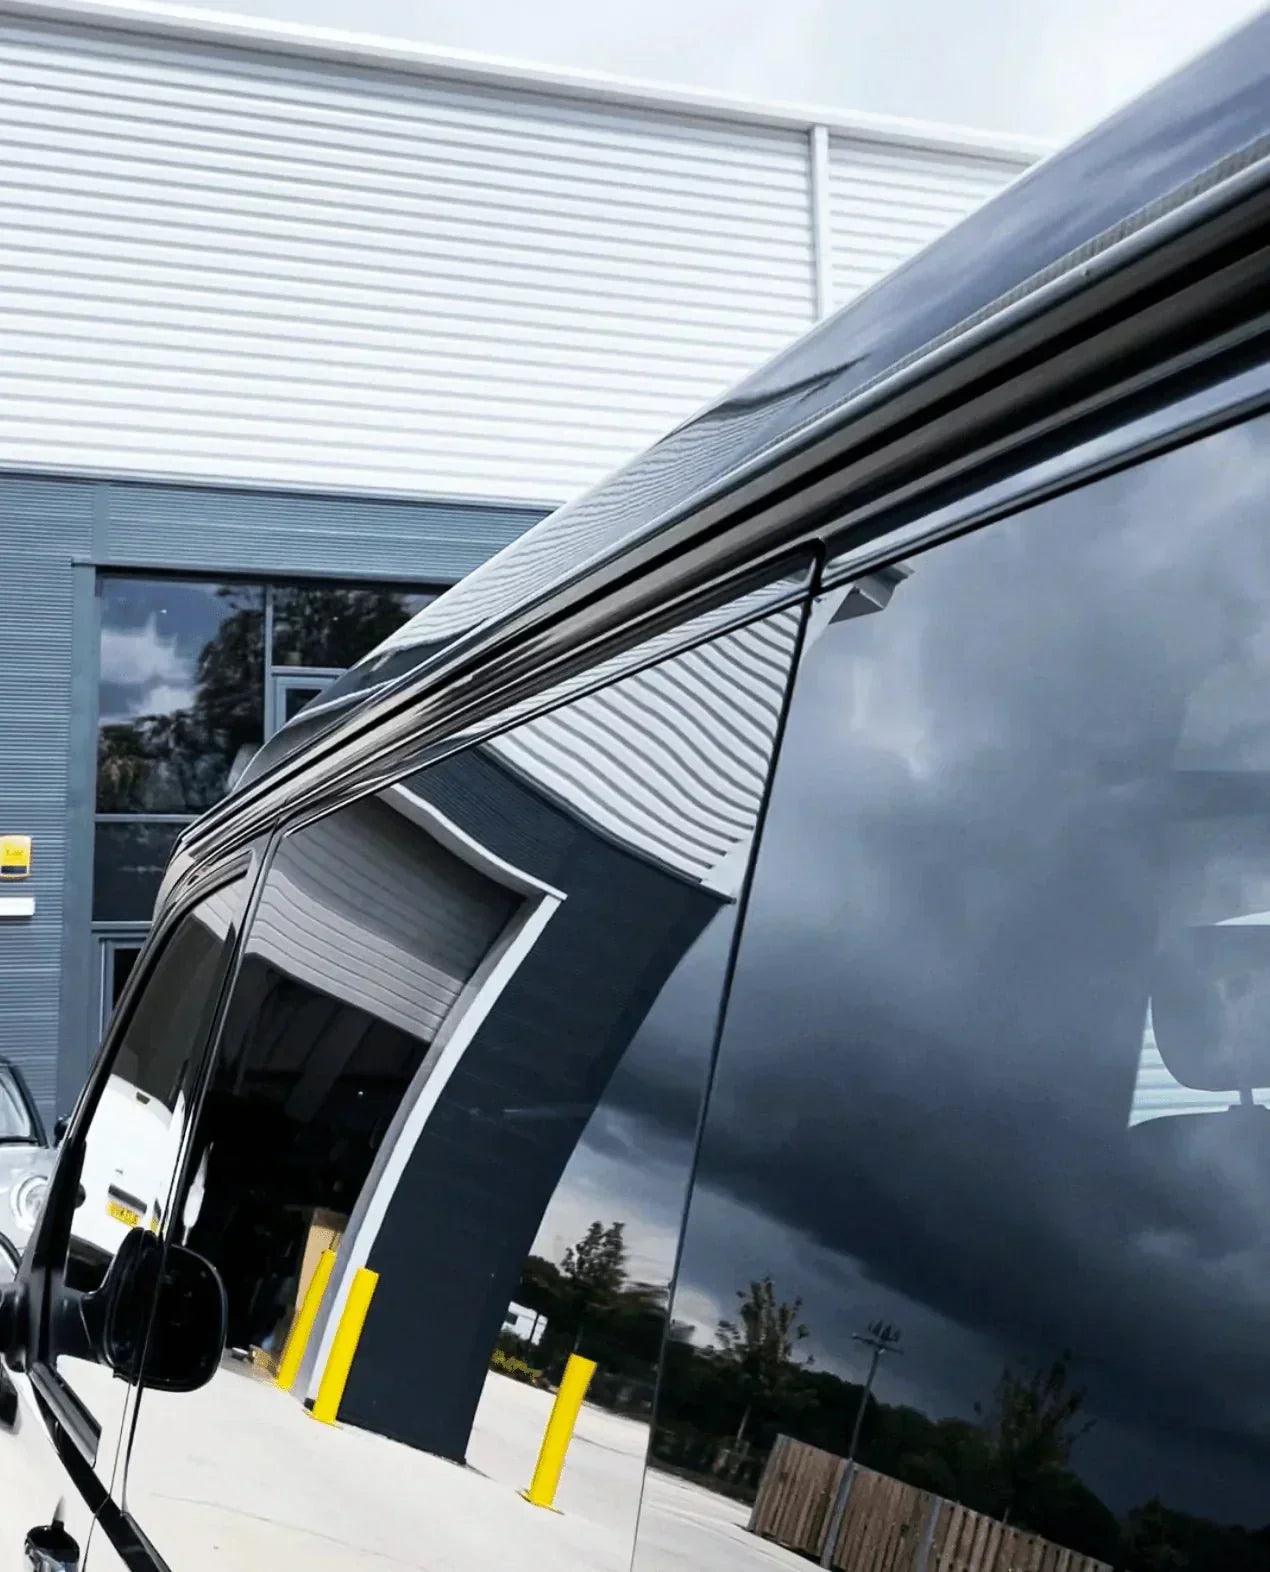
If you own a VW Transporter T5 or T6 Campervan and want to fit a Vamoose awning rail, you don’t need to take it to a workshop. It’s a straightforward job that you can do yourself in under an hour, as long as you’ve got a steady hand and a bit of patience.
This guide walks you through exactly how to fit the Vamoose awning rail properly, based on the method we use in our own workshop when converting vans for our customers.
What You’ll Need
Before you start, make sure you’ve got everything ready. The Vamoose kit comes with almost everything you need, including:
-
Awning rail (keep it in the plastic until fitting to avoid scratches)
-
Front flexible nose cone
-
Rear guard
-
3M adhesive strip (on the front cone)
-
Screws — both black (final) and silver (temporary self-drilling)
-
Polyurethane sealant with nozzles
-
Alcohol wipes
-
Gloves
You’ll also need a few basic tools:
-
Drill driver with a long bit holder
-
Masking tape
-
Pencil and tape measure
-
Box cutter
-
Blue roll for cleanup

Step 1: Preparation
Start by taping off the seams above the doors and windows. This isn’t in the manual, but it’s worth doing. It stops metal swarf from falling into the panel gaps when you drill — the last thing you want is trapped metal rusting over time.
Unpack your rail, separate your screws (silver for drilling, black for final fitting), and lay everything out where you can reach it easily.
Step 2: Mark Your Starting Point
Measure 430mm (43cm) from the seam where the two body panels meet at the front of the van. Mark this spot with masking tape and a pencil — this is where your awning rail will start.
When you hold the rail up, you’ll want around 5mm of space between the shoulder of the rail and the top of the sliding door frame. This ensures the fit looks clean and consistent.
Step 3: Drill and Fit the Rail
Get a second pair of hands to help you lift the rail into position. Once it’s lined up, use the silver self-drilling screws to fix the rail in place temporarily.
Start from the front and work your way towards the back. The van curves slightly, but the aluminium rail will bend naturally as you go — just guide it into shape.
Don’t overtighten. Once the screws are in, remove them again to prepare for sealing.
Step 4: Clean and Seal
Before sealing, get rid of any metal filings. Blow them off or wipe them down — you don’t want them scratching your paint.
Use the alcohol wipes to clean both the van surface and the back of the awning rail. This removes any grease or residue so the sealant can stick properly.
Apply a small blob of sealant into every screw hole, then run a continuous bead along the back of the rail.
Step 5: Final Fit
With your sealant in place, line the rail back up to the screw holes and secure it using the black screws. As you tighten, sealant should squeeze out slightly — that’s a good sign you’ve got full coverage.
Wipe away any excess with blue roll or an alcohol wipe before it dries.
Step 6: Fit the End Caps
The front nose cone has 3M tape — peel, stick, and press it firmly into place. The rear cap doesn’t, so you’ll need to score the back of it lightly with a blade to give the sealant something to grip.
Apply sealant to the back, fit it in place, and run a smooth bead around the edges for a watertight finish. Mask around it before sealing to keep things tidy, then remove the tape once it’s smoothed off.

Step 7: Finishing Touches
Once the sealant’s set, give the whole area a final wipe down. You can add an extra bead of sealant across the top of the rail if you want extra protection from water ingress — it’s optional, but worth doing.
The Vamoose rail doesn’t just hold your drive-away awning — it also acts as a rain gutter, stopping water from dripping into the van when you open the door. Many people even fit them on both sides for this reason.
If you’re planning to fit a Fiamma F45s wind-out awning, Vamoose make brackets that clamp directly into this rail, so you don’t need to redrill the van.
Final Thoughts
Fitting a Vamoose awning rail is one of the easiest upgrades you can do to your VW Transporter. It’s neat, functional, and sets your van up perfectly for an awning or canopy setup.
Take your time, seal it properly, and you’ll have a clean, professional finish that looks like it came straight from the factory.


Leave a comment
This site is protected by hCaptcha and the hCaptcha Privacy Policy and Terms of Service apply.